For example, my little mini-ITX headless server needs occasional terminal input, and leaving my big screen and keyboard nearby is taking up valuable space that I prefer to devote to more important issues...like laundry or loose change or perhaps a book or two.
| Desktop clutter comparison: extra monitor & keyboard vs serial cable & laptop | |
| Headless Mini-ITX board booted to Debian 6 (LXDE) using native keyboard and monitor. | Headless Mini-ITX board booted to GRUB, seen through serial port. Laptop acting as terminal |
Hardware
 The server has a good, old-fashioned RS-232, 9-pin serial port for the console connection. One client also has an RS-232 port. A different client (laptop) has only USB ports.
Connectivity Test of the null-modem cable between two machines with serial ports. This test proves that the cable is really a null-modem cable (not a data cable) and working, that the serial ports are working, and that both systems are configured correctly, If possible, avoid using the USB-to-serial adapter for this test - it adds another variable unnecessarily.
Plug the cable into a serial port on each machine. Designate one machine Server and the other machine Client. It really does not matter which.
On the Server , open the serial port, and leave it open.
# getty -L ttyS0 115200 vt100
On the Client with a serial port, install the screen application, then use it at a terminal emulator to connect over the serial port.
# apt-get install screen
# screen /dev/ttyS0 115200
  (Hit return once or twice)
When finished with screen, quit using the command (CTRL+A , then backslash \)
You should be able to login to the Server from the Client. If you have problems:
- Make sure you didn't start multiple screen sessions (they interfere)
- Make sure neither machine is running both getty and screen on the same port (they interfere). One machine should run getty, the other should run screen.
- Make sure both sides are using the same speed (115200). This modem setup does not auto-negotiate speeds!
- Try varying which service starts first. After each attempt, kill both the screen and getty services (but only the getty running on that port!)
Configuring the Server
If the console is available during a reboot, then you don't need that external monitor or keyboard anymore! A nearby laptop or desktop can serve (this saves me a lot of valuable space). In order to be useful at reboot time, the bootloader and startup need to be configured to use the serial port.
I'm assuming the first serial port (serial 0 = COM1 =
/dev/ttyS0) 1) Add the serial port to the bootloader.
If using grub, see the well-written instructions on the Ubuntu Wiki.
If the bootloader is Syslinux, add the following line to
/boot/syslinux.cfg. It must be the first line.serial 0 115200
2) This server runs Debian 6, which uses
sysvinit (for newer, upstart-based systems, see these instructions). Edit the /etc/inittab file. Add the following line near Line 55, with the other getty respawn lines:T0:2345:respawn:/sbin/getty -L 115200 ttyS0 vt100
Reload the inittab using the command
init q3) Edit the
/etc/securetty file. In Debian 6, this isn't necessary, the proper ttyS0 entry to create a serial port already exists.Instructions
Even better instructions
Thorough instructions, including bootloaders
Syslinux instructions
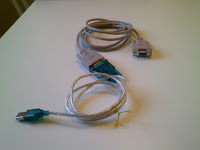
Configuring the Client. Not much to do here, since screen is already installed. It works just like the test. If the client does not have a serial port, use a serial-to-USB adapter as shown below.
# screen /dev/ttyS0 115200 # Null-modem serial-to-serial
# screen /dev/ttyUSB0 115200 # Using a serial-to-USB adapter
I found greater success if the server getty is started first, then the client screen. Including when trying to catch the grub boot screen - push the power-on button on the server, then hit [return] on the client to launch screen, then slowly press a few arrow keys and space bar until the menu appears. Sometimes the connection just doesn't work, and after a pause (grub waiting), you hear disk activity (kernel loading). Then just poweroff the server and try again.
Switching client and server. Console setup is one-way only, because screen and getty cannot control the same port at the same time. If inittab on the server causes getty to respawn, then edit (comment out) and reload inittab to kill that getty.
Running screen as user instead of root. Screen might refuse to start for a user if the serial port is owned by root. Running as a user is preferable if you'll be using the serial port a lot.
Create a new group, add the group to the port, change permissions on the port to match the group, and add the user to the group.
# ls -l /dev/ttyS0
crw------- 1 root root 4, 64 Jun 1 04:25 /dev/ttyS0
# groupadd serialport
# chgrp serialport
# chmod 0060 /dev/ttys0
# ls -l /dev/ttyS0
c---rw---- 1 root serialport 4, 64 Jun 1 04:27 /dev/ttyS0
# usermod <my-name> --append --groups serialport
Log out, log back in, now user can access screen.
$ screen /dev/ttyS0 115200
Capturing console output to a text file. This is handy for debugging and keeping notes. Screen doesn't really seem to have this capability. But hooray for the shell environment - you can use the 'tee' command. The following will save a textfile that gets overwritten each session, so feel free to change the name each time.
$ screen /dev/ttyS0 115200 | tee /path/to/console-recording-textfile


No comments:
Post a Comment